OBS
1. Choose your operating system on the OBS Studio site and download the installer.
2. Launch the installer (exe file). During installation, you can keep all default values.

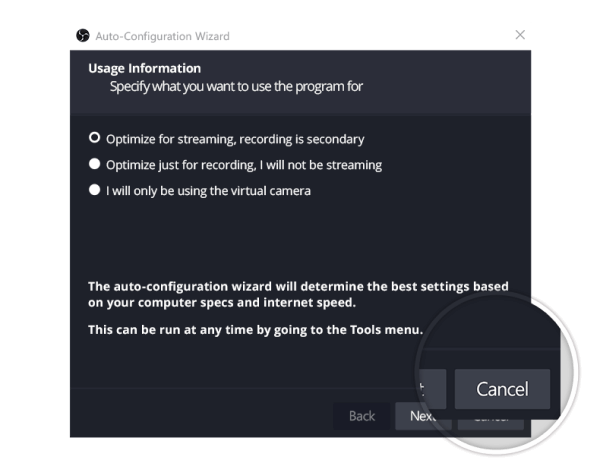
3. After launching OBS, cancel autotune by clicking “Cancel”.
4. For other OBS settings, we recommend selecting your native language. In the lower right corner, go to “Settings”, then go to the “General” section, and choose your preferred language in the “Language” field. Click OK, then click YES in the opened window.

The OBS program will restart and automatically reopen in the language you selected.
obs.start.support
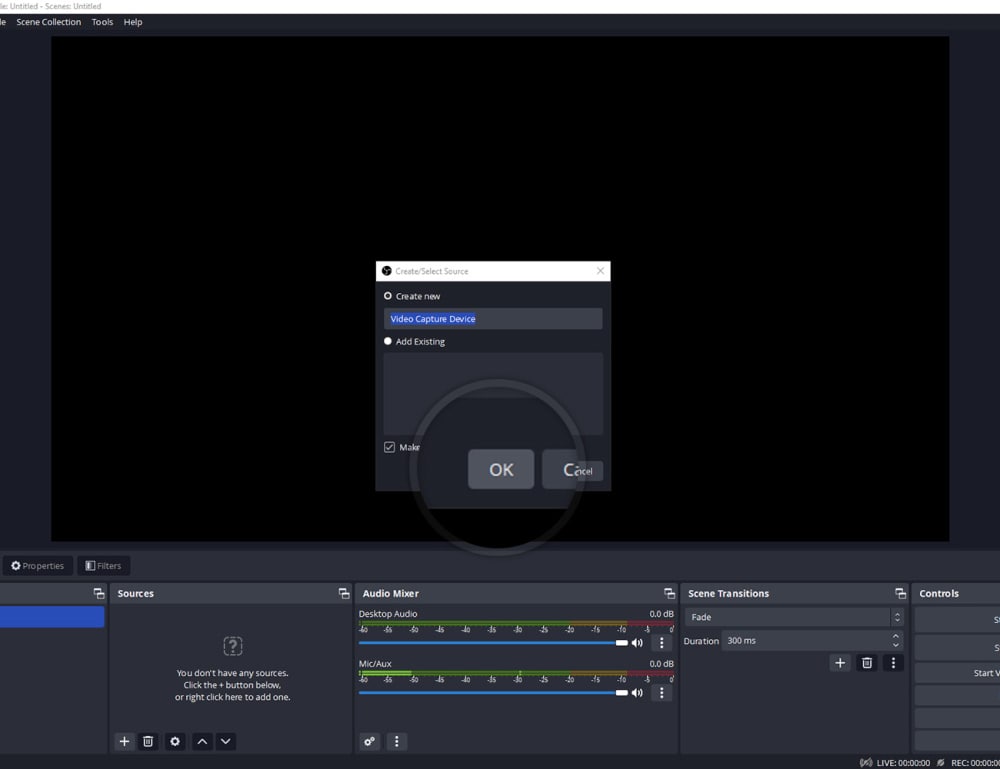
1. In the “Sources” panel, click “+” and select “Video Capture Device”.

Click OK in the opened window.
In the “Properties for ‘Video Capture Devices’” window, do the following:
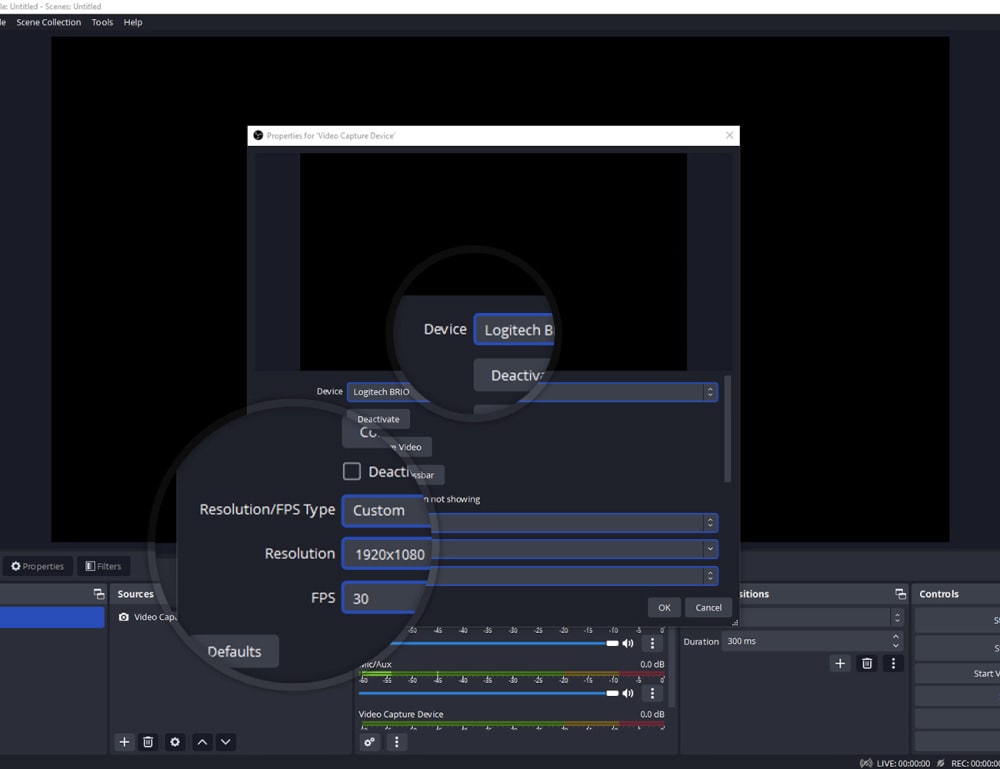
1.1. “Device” – select your camera.
1.2. “Resolution/FPS type” – set to “Custom”.
1.3. “Resolution” – select the highest resolution available for your camera.
NB! Do not use a resolution higher than the one supported by your camera! To do this, specify the maximum resolution of your camera. For example, the Logitech C920 has a resolution of 1920×1080.
Also, do not select a resolution higher than your Internet connection allows.
| Resolution | Minimum upload speed required |
|---|---|
| 853x480 | 2 Mbps |
| 1280x720 | 5 Mbps |
| 1920x1080 | 10 Mbps |
Here you can find the upload speed of your Internet connection.
1.4. FPS: 30
Click OK to save all selected settings.
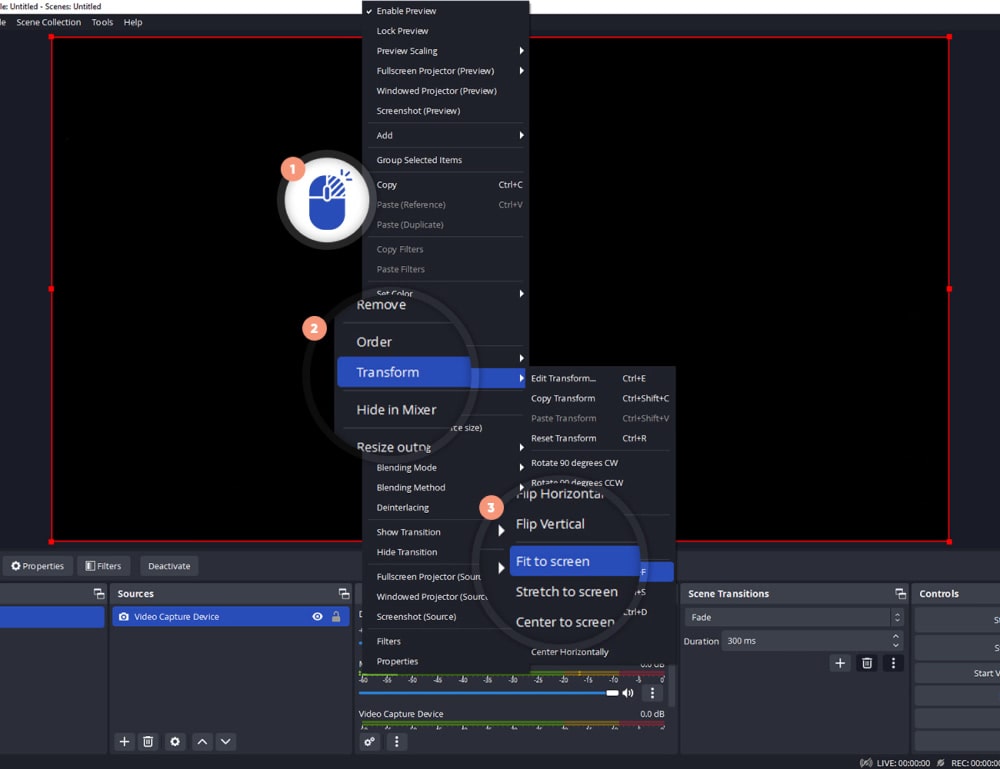
2. Your streaming window must fill the entire OBS screen. Stretch the area with the red border to cover the whole window (Ctrl + F), or right-click on the OBS stream, select “Transform”, and click “Fit to screen”.
3. In the lower right corner, go to “Settings”, then go to the “Output” section, and select the “Advanced” output mode.

3.1. If there are any other options besides “Software (x264)” in the “Encoder” field, select one of them.
For example, you can choose:
- QuickSync H.264, if you use a built-in Intel video card.
- NVENC H.264, if you use an Nvidia video card.
- AMD VCE(APP) H.264, if you use an AMD Radeon video card.
- Apple VT H.264, if you use a Mac.
3.2. In the “Bitrate” field, set the resolution that suits your camera.
| Resolution (W×H) | Video Bitrate |
|---|---|
| 320x240 | 400 Kbps |
| 640x480 | 800 Kbps |
| 800x450 | 1000 Kbps |
| 853x480 | 800–1200 Kbps |
| 1024x576 | 1200–2000 Kbps |
| 1280x720 | 2000–3000 Kbps |
| 1920x1080 | 4000–6000 Kbps |
3.3. Enter “2” in the “Keyframe Interval” field.
3.4. Set the value “0” in the “Maximum B frames” field.
4. In the left menu, select the “Video” section and make sure that the “Base Resolution” and “Output (Scaled) Resolution” fields are set to the same resolution as in the “Video Capture Device” window (see paragraph 1.3).

Be sure to click OK to save all selected settings.
5. Sound can be adjusted in the audio mixer on the main screen. If you want to turn on music in high quality while streaming, desktop audio must be reduced.

6. Go to your model account on BongaModels.com and click “Start broadcasting” in the left menu. The streaming console will appear on your screen.
7. A camera use request will be displayed at the top of the console. Click “Allow”.

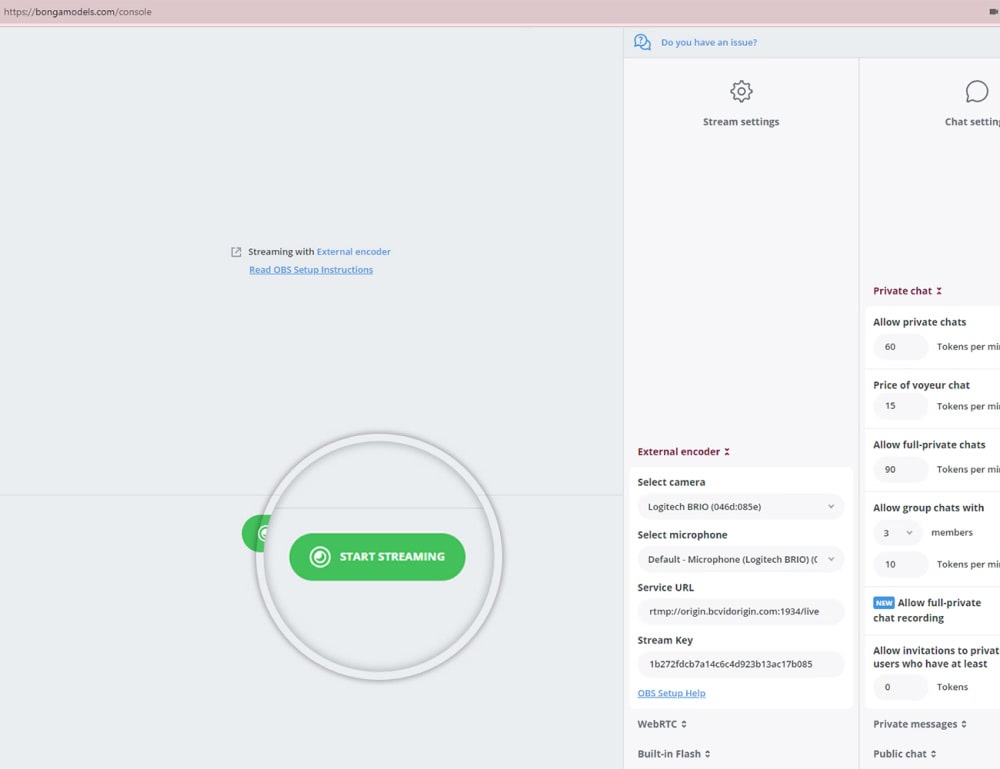
8. In the “Stream settings” panel, select “External encoder”.
9. Next, copy the value from the “Stream Key” field in the settings panel and go to OBS.

10. In the lower right corner of OBS, open “Settings” and go to the “Stream” section. Find BongaCams in the “Service” field.

11. Paste the copied value in the “Stream Key” field.
Click OK to save the entered values.
12. In the lower right corner of OBS, click “Start streaming”.
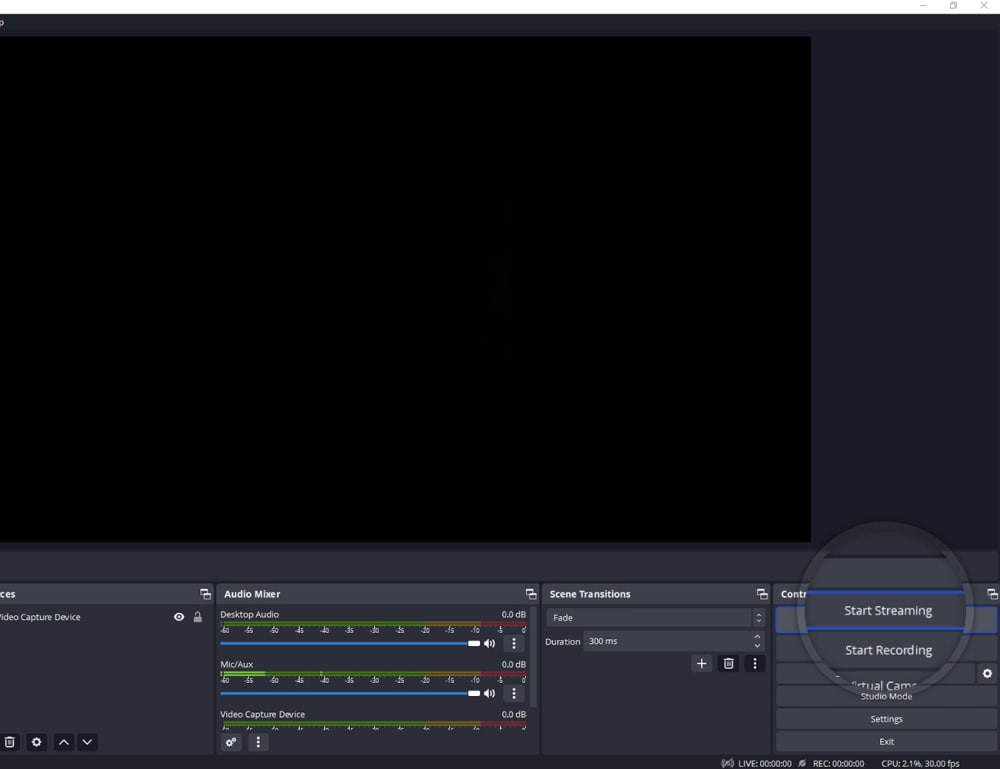
13. Return to the streaming console on BongaModels and click “Start streaming”.
You have successfully set up OBS, and you can start streaming!
NB! When using OBS, the streaming window on BongaModels is not displayed. If you want to see your stream and chat simultaneously, launch “Window projector” in OBS.
To do this, go to “Settings”, select the “General” section, and find “Projectors”. Check the box next to “Make projectors always on top”. Click OK to close the window.

Next, right-click on the OBS stream and select “Windowed Projector (Preview)”.

Now your streaming window will always be displayed on top of other windows. If necessary, you can move it around the screen.
If you have any questions, please contact our Customer Support.
Cam2Cam is a feature that allows you to see the image from the member’s webcam while streaming on BongaCams. Any premium member with a camera can activate it on the site.
A lens icon next to the member’s name in the “People” list in the streaming console means that they have activated the Cam2Cam function. To see the image from the member’s webcam, left-click on their name and then on the “View Camera” button. You can view images from several members’ cameras at the same time.
If a member wants to activate the Cam2Cam function, you can help them to do it.
Here are two simple steps:
- The member should click “Start your webcam” in the top right corner of the chat.
- In the browser request to use the camera, he should click “Allow”.
All set! The member has activated the Cam2Cam feature, and you can now see them by clicking “View Camera” next to his name.